Showing posts with label LibRR1 Round 4 Curves. Show all posts

Monday, April 2, 2012

Round Four Curves!

After fussing and fussing and not finding the way I want this, I finally settled on making this in an OK design and then getting rid of it.  So, I took the next step and made the initial cut and suddenly ... there it was!  Perfect, just the way I want it.  I'll skip the fabric I was going to put around that and the binding, too.  I'll just turn under the edges here and quilt concentric circles.  This is my Liberated Round Robin.  And now it's just the quilting to do.


-Wendy

Wednesday, February 8, 2012

Much better...


I took the left and upper border apart and added some dots and another border and now I like it a lot better.
I was sure the top was finished, but as I look at the photo there seems to be something missing in those green corner spaces ..
Heidi


Monday, January 23, 2012

Still no progress

Hi, thanks for the reminder.
I'm still stuck with the curvy part, the last thing I came up with where some random dots.
Here's a try, but I'm not happy with it. Maybe it only needs a lot of more blue dots. 
I also thought about fish shaped parts.


Any suggestions are highly appreciated :-))
Heidi

Friday, January 20, 2012

Round 5: Curves.... Really?

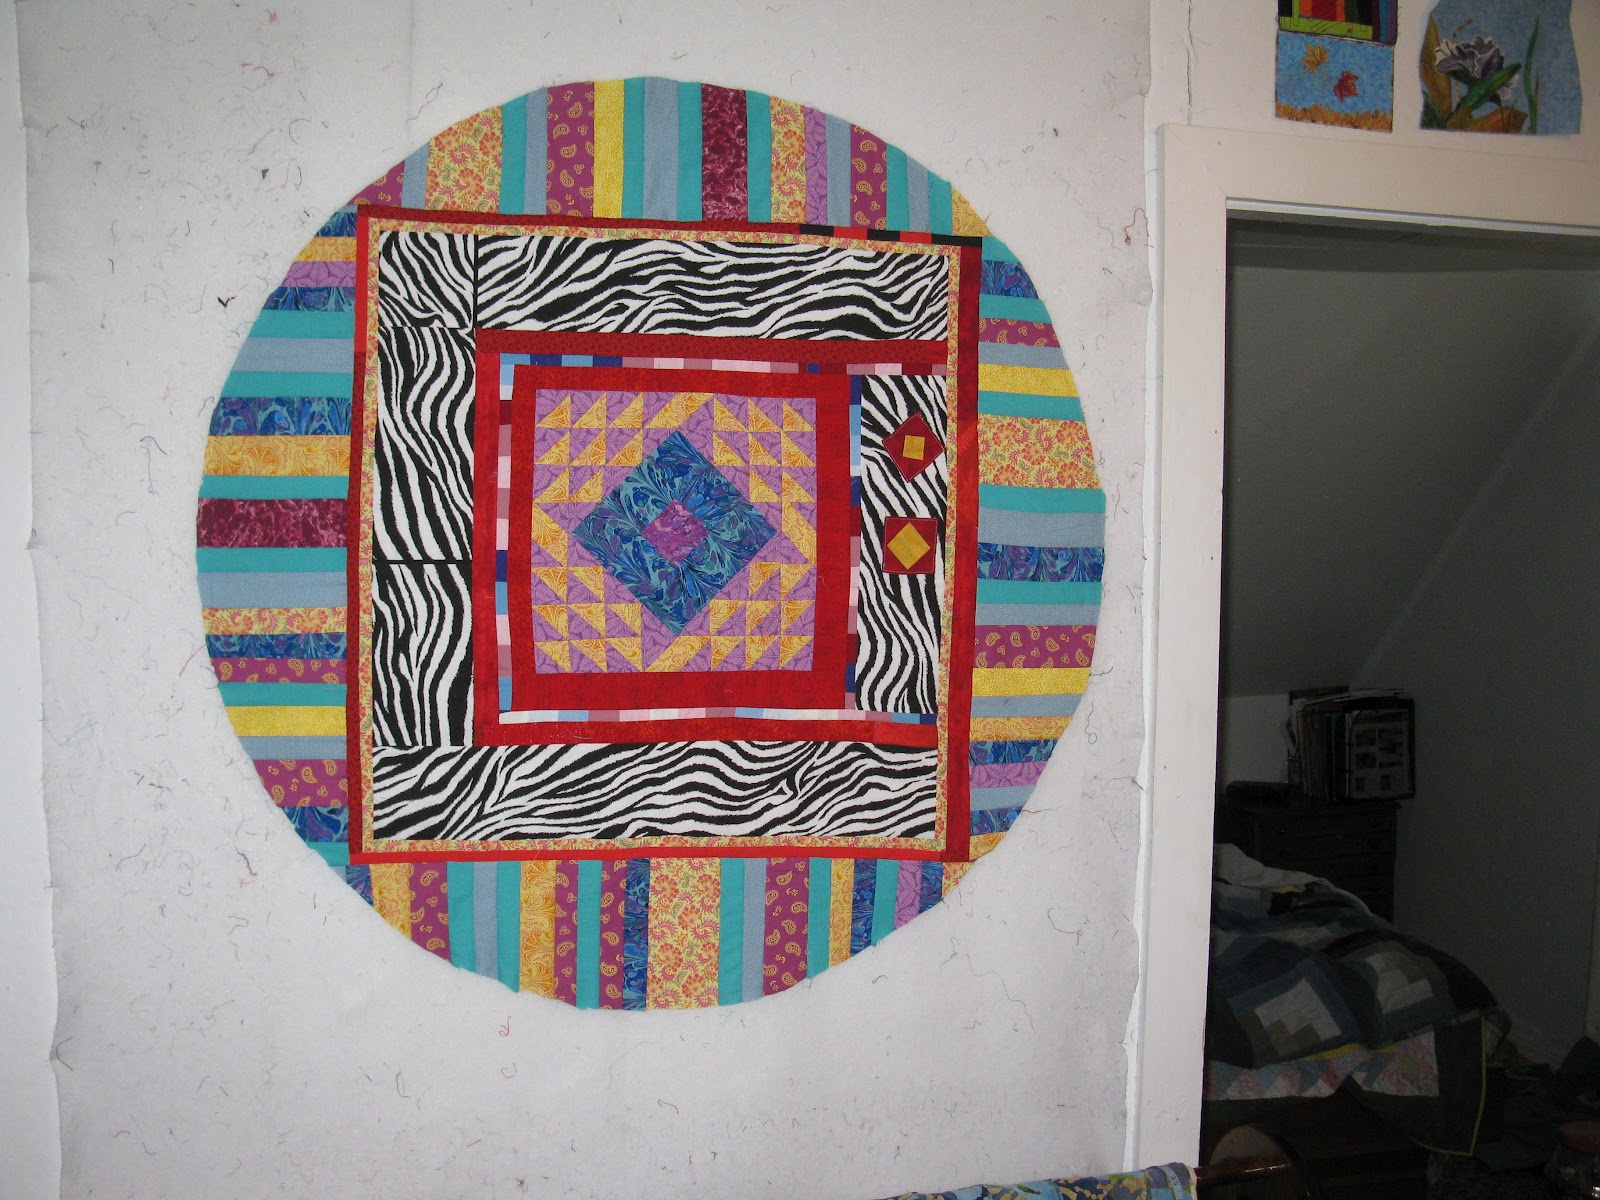
Well, just as this border went 'sideways' the picture did too. If you want to view it as it is on my design wall, pick up your monitor and turn it 90 degrees to the right.  Anyway, the objective was to create "curved ribbons" similar to the printed fabric in the prior borders.  The process was the technique at Victoria at Bumble Beans blog called wave runner.  I think it achieves the look better if you are A.  using longer pieces and B. not really trying to create a specific copy of something.  So I am debating keeping these, or scrapping them and starting over..... which is really not an option because I don't have many of the fabrics any more.   So... I have decided to rename the piece.  It is now : Fiesta with Ginsu Knives.  Really. What d' ya think?

Tuesday, August 16, 2011

Rounds 3 Letters & 4 Circles

And not necessarily in that order.  I think I have completed 3 & 4, but I keep seeing just one more spot that could use another circle.  The size now is about 22 wide by 26 high.  I had a lapse of about 4 weeks from sewing while I removed wallpaper and painted my studio. I have posted photos of the rehab over at my blog at http://judyspod.blogspot.com/   I really am unable at this point to explain how all these things came together, which I guess would be why it is called a Round Robin!

Saturday, August 13, 2011

Behind Schedule

I thought I would have Round 4 done quickly. My mind went to vines just as Heidi described. Then I talked all about easy curves, remember? Well I made some curves, discarded most of them, set the quilt aside, then decided on one curved border and three plain. But the borders aren't yet stitched. The style of my curved border doesn't seem to go with the rest of the quilt. I'll get back on track as soon as I can, though, and post a photo soon.

Thursday, August 11, 2011

Stuck

When I read the rules for round 4 I immediately had vines and leaves and flowers in my mind. 
So I added another plain green border and positioned some vines on it and looked at it and looked at it ....and tried to see some leaves and flowers...no, I don't like this idea any more..
So now this piece already hangs for more than a week on the wall.
What I'll probably try this evening are some yellow circles in different sizes, dancing on the 2 borders. Maybe that will work..
Heidi

Thursday, August 4, 2011

Oh, my Dyslexic Self!!! Or, at last I can see!

Finally, some curves I like!!

After ordering some fabric to make the border, I approached cutting the curves with lots of anxiety!  I tried Debbie's http://stitchintherapy.blogspot.com/
directions as best I could.  She suggested:
Wait don't panic....it looks very good. Don't add more purple, go with the dark green. Here's what I would do. Press as flat as possible--stray starch a lot--- and don't trim the purple. Cut strips of green at least 4 in wide. While flat, slide the green strip UNDER the purple edges--one at a time. Then cut thru both purple and green and do a very slight, gentle curve. This way you are assured of matching curves. Flip the green to top of purple, match edge and sew a very little at a time, stopping and aligning as needed. Or the other option is once cut...press under the cuved edge of the green 1/4" and topstitch to the purple. You can do this and make it spectacular.

So I tried cutting it this way:
 With the green underneath, I tried cutting both wrong side and then right side.  You guessed it the curves ran the same way and didn't fit into each other!!!  Oh my, why couldn't I "see" that!

Then I tried it this way---running out of fabric here (panic, panic)
  Ah, ha!  It fits snugly and the resulting sewing it together WORKED!!!

I've trimmed it now, and hope I didn't take too much off the sides, as I don't know what the next round of the liberated challenge will be.  But, at last, I am satisfied!!! I'm liking it! http://pattilousquilts.blogspot.com/

Monday, August 1, 2011

Curvy Joy

My Curves are pieced together using the mirror method (cutting curves in two pieces of fabric and putting the mirror images together by machine) and then I added 3 oddly curved shapes and button hole stitched around them. I only put them on the bottom of the piece because it is getting big...  I added narrow strips on the other sides to separate the piano keys from the next step.  Onward!  


Saturday, July 30, 2011

Jan---Round 4 Curves

I made some changes to Dogs and Dots.  I wasn't coping with my round 3 rectangles with curves well, so I just chopped them off and made a small border of rectangles, added a 2" black border and started adding curves.  I used both needle turn applique and iron on applique.  I may add a little embroidery to the floating dots, but for now it is time for the quilt to hang on my design wall.  I'll be making some trips by it--- taking peaks to see if  it needs to have a surprise here and there.

Friday, July 29, 2011

curves!

This is wild....I enjoyed making the curves!  I am also thinking about embellishing this when it's finished...
Hopefully with the last round I can pull it all together!

Thursday, July 28, 2011

Me and You: True Blue

Rectangles and lots of curves added so I'm all caught up! I remember my grandmother making yo-yo's and thought they would be fun -- and they are. I plan to add a decorative button to the center of each so will look for some when we go to Panama City next week (fabric store, here I come!) Can you believe that I have so many different blues in my stash -- and there are more to come. This quilt is fun, not knowing what might be added next! For the curved patches, I used instructions from Kathryn Schmidt's book "Rule Breaking Quilts."

Tuesday, July 26, 2011

Curves, hmmmmm . . .

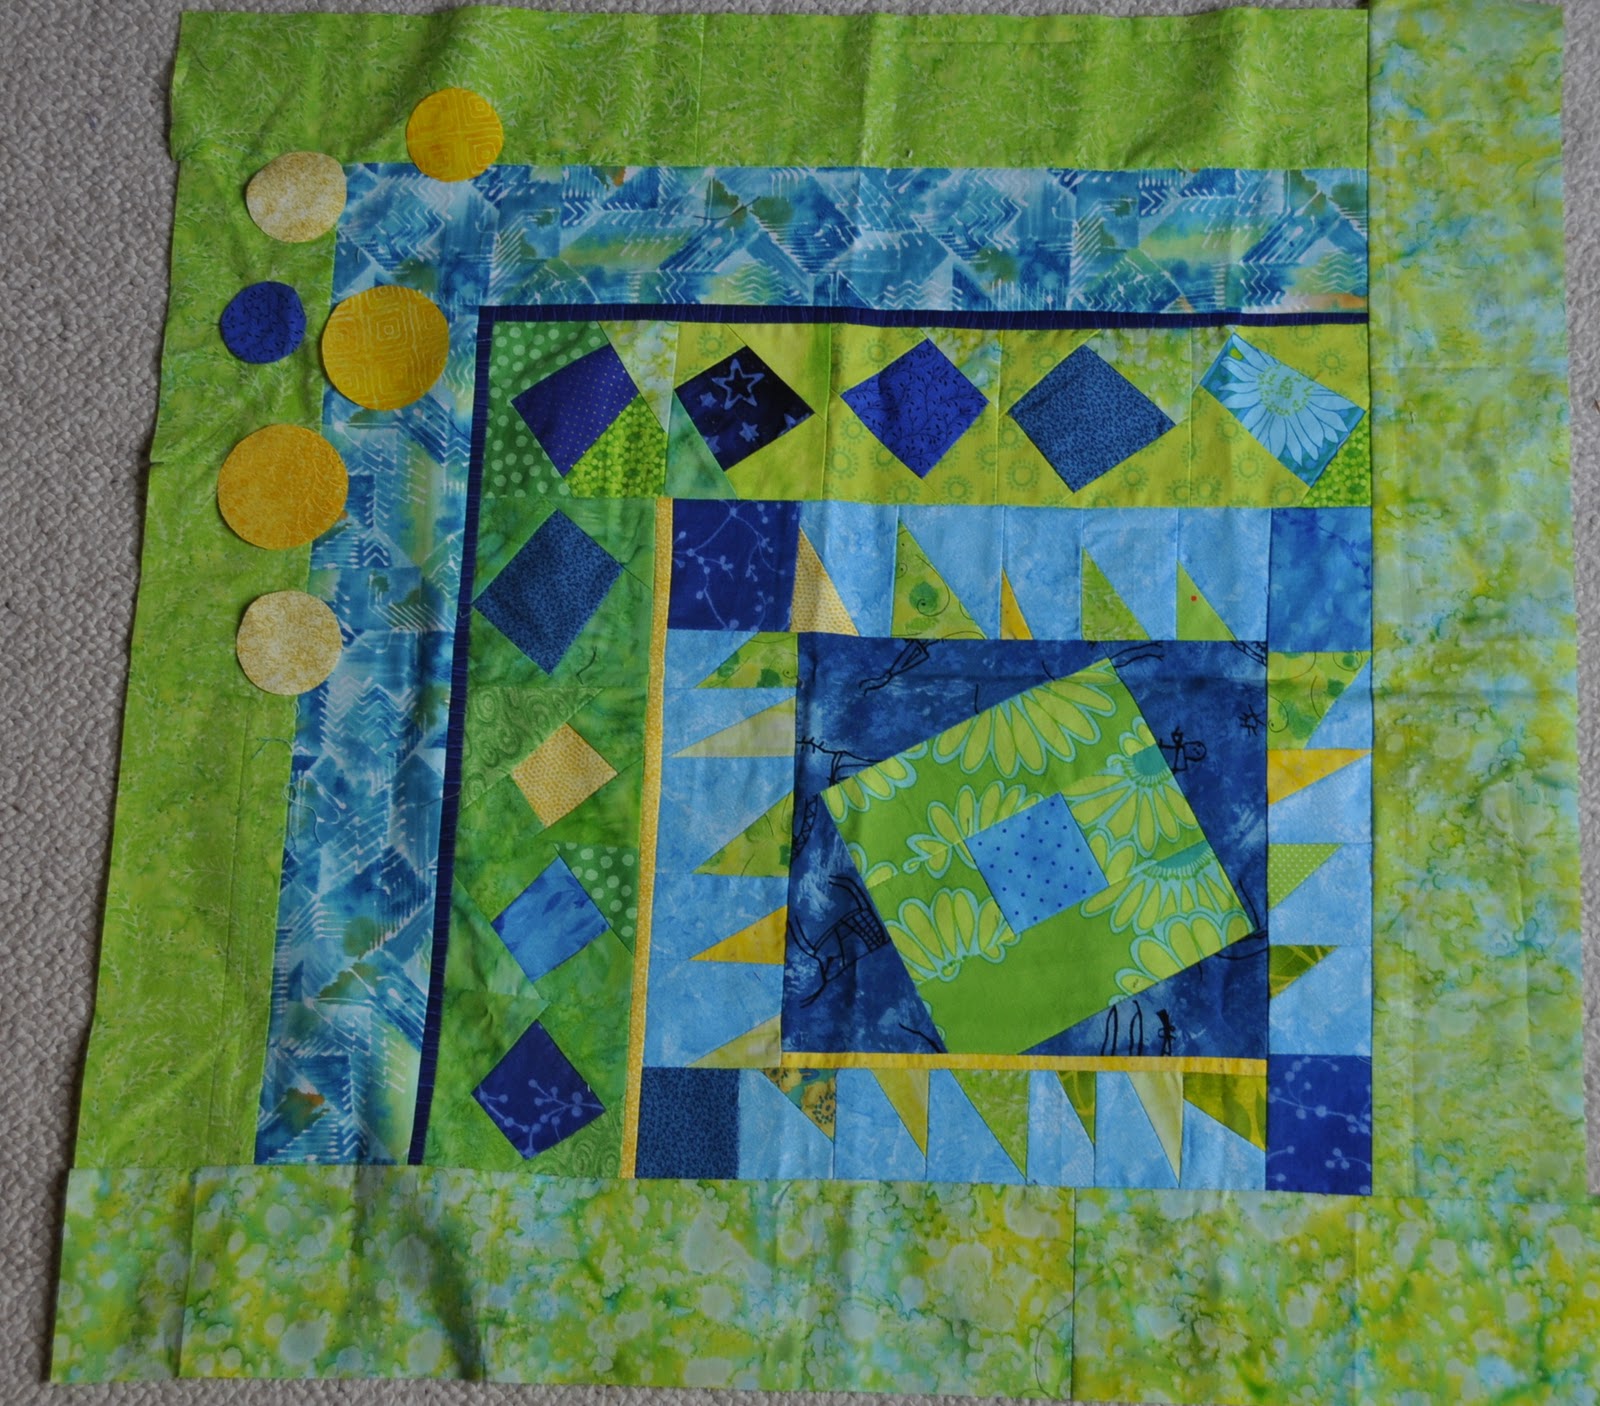
I hope my little circles will count for my curves. The star is a half circle that I inset, but it doesn't show. Actually the star was a circle, but I liked the look of the half circle sitting on the rectangle. It still looked a little static to me so I added the little circles to add movement and to encourage the eye to look for all the other dots and circular curvy things. The size is about 31" by 24".


.

Friday, July 22, 2011

LibRR1 Round 4: Curves

Thank you again to all of you who are participating in this online Liberated Round Robin! It's been inspiring to see your creativity!

Those of us needing more time to get caught up, or if you want to add even more rounds inbetween the ones we have suggested - of course go ahead!

For those ready to more on >>>>> Wouldn't it be fun to add some curves to your project?

You can do this by doing applique, sewing bias strips down, sewing circles, making curves seams with different fabric, or _________ (you fill in the blank with your idea!).

As before: please post a photo on this blog when you complete the round (include the measurements and the URL of your blog), and if you have used an internet resource to construct your curved round, do share the link with us or just tell us what you were thinking as you worked on your project.  Check back to see what others have done - and do write comments!

Also, be sure to click to verify that the correct information for you has been added to the Who We Are page.

We have at least three weeks to work on this round; our next and final step for this first Liberated Round Robin will be posted on August 12th.**  We may push this date back a week or so, to give everyone more of a chance to get caught up.


If there is interest, we'd like to do another Liberated Round Robin sometime in the fall - but this time it will be set up so different people (who participated in this first LibRR) will be able to sign up to write up the directions for a round! An email will be sent out in September.