Thursday, May 31, 2012

Round Four

SERENDIPITY
Wasn't to sure what that meant so I have been thinking about it and looking at my quilt so far. I liked what I had but still thought it needed something. I had these houses that I had just made recently for another project. first I tried them as a border. didn't like them so then just laid them on top. Much better so I started slashing and inserting again. I really like it so this is what I am doing for serendipity. I know this is supposed to be the final step but I like big quilts so I am going to keep going. It is 36x31 right now and I copied off the directions for liberated quilt #1 and I am going forward with those directions. Wish me luck. This was a lot of fun and I would do it again.

Wednesday, May 30, 2012

In Search Of Serendipity

My wonky stars were seeming a little claustrophobic after the last round of color.  The pink seemed too much.  I also had two more stars to work with.  So, as much as I hate to rip.......I had to back off some.  I added the other two stars to balance out the center design.  I didn't have enough pink to completely encase the larger design, and I didn't think I wanted to anyway.  So I decided to cut some more of the yellow into that bright pink border.


  I was feeling pretty good about it now, but the stars are so subtle. I wan't to do one last thing to help them stand out against the bright colors, so I quilted around them.  I think you can see it, they almost puff out in person.  Here's another picture of one of them.


Now all it needs is the binding.  I'm thinking no more pink.  Do I do yellow...or come back with a light blue or white with blue print?  What do you all think?

Friday, May 18, 2012

Liberated Round Robin 2 --- Step 4

Good Morning --- This is Jan with Step 4 or the Final Step for LibRR2.

Everyone has made some creative quilt segments and it  has  been fun seeing how each person interrupted the steps and made them their own.

We have slashed, cut, created unruly fabric, re-purposed crumbs and spiced it up with color.  Now it’s time to put it all together into a completed quilt.   For this step I’m thinking  of a word


Serendipity.

Serendipity is the gift of finding valuable or agreeable things.

Put your quilt top or quilt top  pieces on the wall, step back.  Start arranging your pieces into a look that makes you feel good.  Maybe take a photo of your quilt top or your various quilt top options.  What does it need to make it “pop”?

Should you have a border?  Solid or maybe Sawtooth?
Does it need more accent color or pattern?
Maybe some applique or embellishments?

What is your top missing? Or what does it need to be complete?  How does it make you feel?

You be the judge.

Use the gift of Serendipity to complete your quilt and most importantly have fun.  


For your final posting---Create an artist statement about your quilt
                                        Post with photos
                                                      descriptions, 
                                                      and size of your completed LibRR2 quilt.   

My Final Posting for LibRR2 --- Since I knew where the final Step 4 was going to take us I decided to use Serendipity and complete my AAQI quilt.

After placing my mini quilt on the wall, taking a few photos, walking away and coming back just to look at the quilt I decided the quilt needed some "bling".  So I added a few square purple beads.  I continued my thought that the quilt looked like it was exploding and added the beads to accent that feeling.  I then completed the quilt with hand quilting. 
I'm calling my quilt Celebrate.  The liberated log cabin seems to be exploding with excitement.  I found it interesting that during the time frame this quilt was created, the Federal Government pledged to spend more money for Alzheimer's Research.  Since day one this mini LibRR2 quilt was earmarked to become an AAQI quilt, it seems the quilt is celebrating the exciting news to help find a cure for this devastation disease.
The quilt measures 9 x 8 inches

I look forward to seeing every ones completed LibRR2 quilt.  Have fun with your Serendipity!

Thursday, May 17, 2012

Finally Finished

Well, it's better late than never.  Here's "Reflecting Pool", my Liberated Round Robin #1 project.


-Wendy

Adding color

I shouldn't be intimidated by this project but I am.  It took me three weeks to get up the courage to try this next step.  Sheesh!  I'm pleased to say that I'm happy with the results!

Wednesday, May 16, 2012

Catching up

I made some crumb blocks and then didn't know what to do with them.  Played around some more, then added some lime green bits.  Tried a couple of other things.

Then I decided to make a wonky sawtooth border for the top.  Pretty happy with it.  Eager to see what the next step is!

Tuesday, May 15, 2012

Round 3 done at last!

I decided to go with black and white, was feeling like I already had plenty of color. I had a piece of unused black and white strata, cut on 45 degree angle and added after I added a mostly black border to break the color from last round. Hope next round calls for color now I think it has to much black and white ;-)

Sunday, May 13, 2012

Adding color...and I found an old UFO to use

As I was going through my drawers in my sewing room today, I discovered this:


I had started it last year for a challenge, and put it away while I got distracted with dozens of other projects.   It uses pretty much the same process as the one we're doing for this project, so I decided that I'd just do two of them now.

This step is to add color.  As you look at this piece, you can see lots of yellow.  I had a nice canary yellow solid in my stash, and added borders to this piece. I think they brought everything together quite nicely. : )


The piece below is the one I started for this current project - it began with the pansy block.   I wanted something bright and cheery, and was torn between red and green. My red wasn't cheery enough - so I went with the green:

Saturday, May 12, 2012

LRR3!!! I did it, I did it! I blinking did it!

Ah, Ladies, it took me some time, it took me some more grey hair (I don't actually have any but it sounds good), it took me some more wrinkles, and it took me ages! BUT I got there eventually....

You see the problem was, with the detail... isn't it always, we had to 'inject colour' - I already had so very much colour that my Blocks can't be removed from their box unless all viewing are wearing a welding mask and are behind a radio active shield... So you see my dilemma was huge :-(

I wrangled, and pulled, and tossed and turned, blew hot steam out of my ears and blue smoke from my nose, yet still couldn't find a way to complete this leg of the tour...

Until my beautiful partner (He who shall not be named), unwittingly pointed to my rather cluttered (and newly elongated) sewing table with a disgusted nose, which read - look at that mess, she needs to clear it up. I did and lo and behold, a fabric brilliant for this leg fell out from under the others. Black with multicoloured flowers, little flowers so from a distance it looks like a grey. Perfect I thought, I can frame, cut, slice, pin and poke with this and all will be good and calm in the Liberated Robin that is round and comes to visit us once a month....

Having avoided the blocks since the post detailing what we were to do came through, I got them out, pawed them, stroked them, wondered and pieced (mentally) and then came the hack and slice....

Which then prompted the sew up and seam...

Am I pleased with the results? Oh well, yes I am, very much so, and sew I should be... As should our own dear Queen... 'You'll see!'


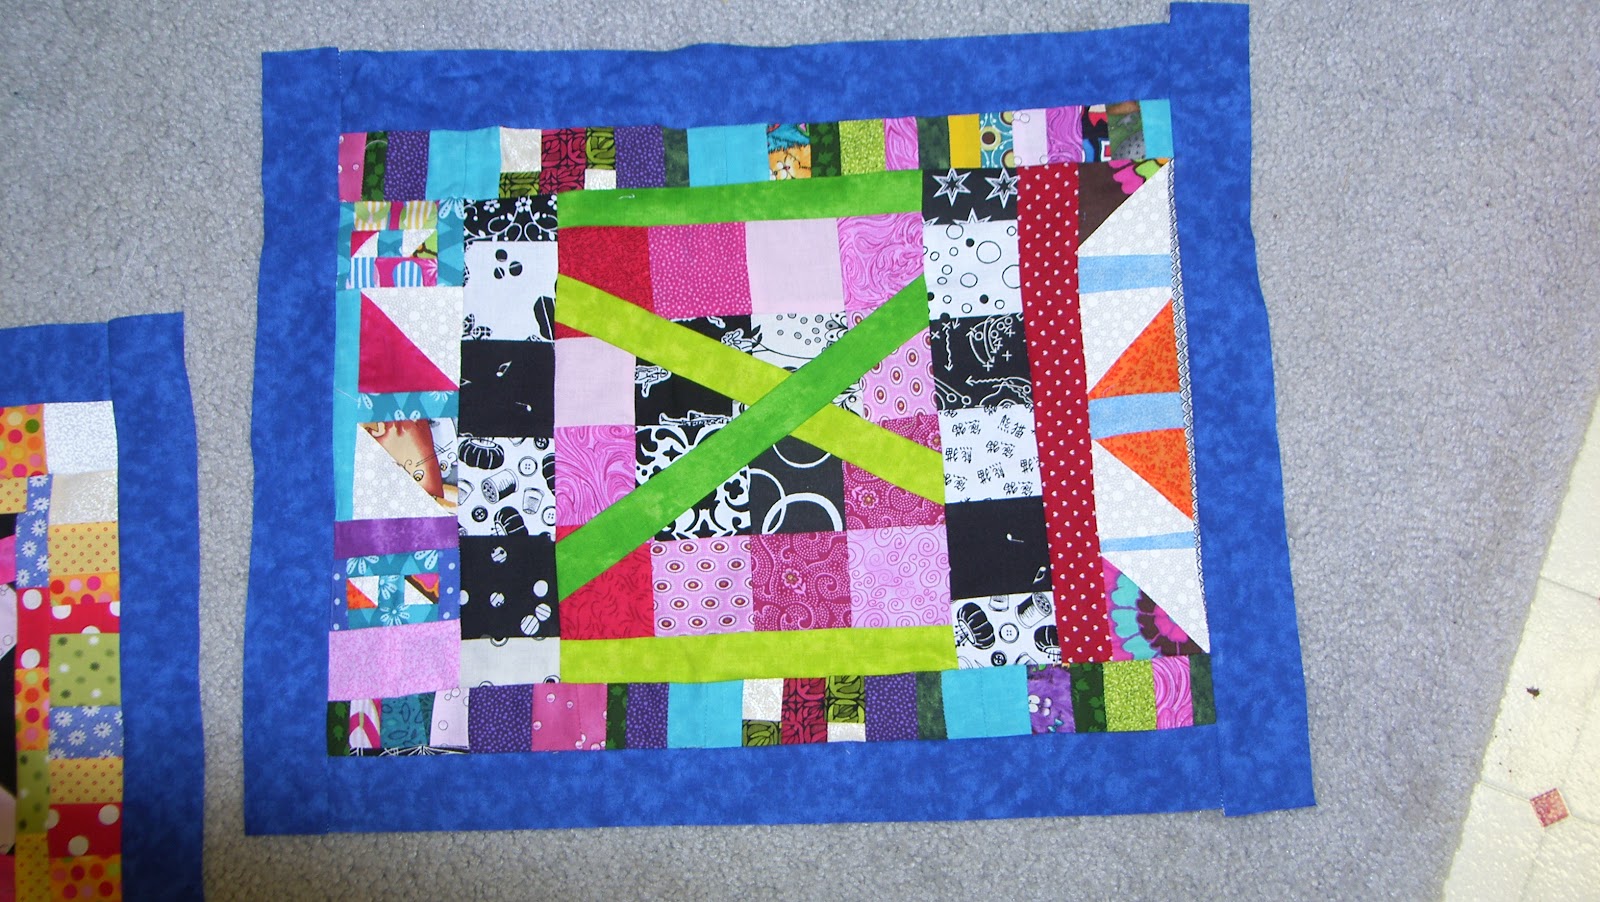
There you are!!!! two blocks, I couldn't just couldn't do anything with my other two yet... thats a time will see one... But, I love the tea cup I did!!!! lol Can't have anything British without a brew can we?

Wednesday, May 9, 2012

It's Purple---Step 3 Complete

After much thought---I decided that my color for Step 3 needed to be Purple.  I noticed many little bits and pieces of purple in the feed sack fabric and since this is going to be an AAQI quilt, purple just had the be the color of choice.  My big problem was what to do with it.  I started thinking about some liberated flying geese.  Then I was going to make my fabric from Step 2 into to liberated stars, but nothing was looking like I wanted it to---so I started cutting strips.  I noticed that the black in the original log cabin seemed to be exploding out the side---so I made one liberated star to accent the movement of the black fabric in the original block.  What fun!!  I love not knowing exactly where you're going until you get there.
The little quilt measures 8 x 9 inches and is ready for Step 4.

Tuesday, May 8, 2012

  Hustling right along, getting caught up after a week of making sailboat stuff, not having quilty fun. I finished Step Two by doing a zigzag around all those crumby circles (what was I thinking when I made those?!!) and then adding crumby borders.Okay. Now for Step Three, color. OMG, I have so much color the only thing I can do is use a solid -- everything else made me cross-eyed. I do have more black but that looked too dull and not a "color." So searching through the stash, I found 4 colors with enough fabric for a wide border, all possibles. Which one do you like?


Stepping ahead

This liberated thing is hard. Not sure that I like this block. Sigh.
But let's give it a chance. I started by adding more color.


For Step 2, I had a great time making a whole pile of squares with bits and pieces (ignore the pandas--I was using that quilt as a design wall), but when I put them with my block----yuck. Didn't work. What next?


I didn't know where to go with this. I'm wishing I had done something different. Other people's blocks look so much better. Why can't I be free and easy? Should I start over? And then my sewing machine jammed.
While waiting to get it fixed, I read Step 3: Color. And thought, ok, add more green.

 Hmm. That's enough green. What about more yellow? No. Orange? No. Needs more red.
Someone had left scrap triangles at my guild's free table, and I added more strips to make big red triangles.

And maybe add just one little square in the middle?

Leaving it here until the next step...

Step 3 Color and Falling Down the Rabbit Hole

I'm almost late in posting Step 3 because Step 4 is right around the corner.  Now we have to deal with my choices which is where I went down the rabbit hole just like Alice.

The directions were color.  I'm not afraid of color.  No problem.  But first I thought I should contain my last round with some black.  Done.  Then, I thought I would make some very bright wonky log cabin rectangles for the next row.  But I made them too big and they looked odd.

So, I decided to add very large orange chevron fabric (ala Gwen and Freddie except they usually add smaller black and white chevrons... ) Yep, I went for large, very large, orange chevrons:

Hmmmm, not sure whether I'll keep the chevrons or ripppppp it off and try something else.  Maybe if a few pickup sticks went through the chevrons it would work.  What do you think?  Stay or go? 

I do think I met the color requirement for this round...just saying.

I so enjoy seeing what everyone else is creating!

Monday, May 7, 2012

Oh My Gosh!

We now have 50 followers for this site!  What fun!

Only about half of us are taking up the challenge for LibRR2 - even though there are just ten days before the fourth step is posted there is still time to join in!

I'm late myself and am still on step 2 - but have organized scraps by colors so will be working on this again....

: )
June


Bit of a Stick in the Mud...

Well what can I say, totally at a 'quilting' , sinking sand stop check. I have taken by blocks out of their file, looked, felt, dreamed up, and still end up putting them back into their file having nothing done to them, nor thought of doing to them.


I haven't even thought of what fabric I will use, colour wise yes, I have that.. Mums the word though, but I can't quite get into the theme and make the end in sight.


It could have something to do with two of my machines being in repairs, both the Elna's are with Ian, the mechanic, and I have missed them, even though they are fairly new to the house,... and I do have a machine that is specific to quilting. But these are fabulous for doing intricate work as they can sew sooo slow, where as the Toyota can run away, which you don't need as you are turning a bend on a letter do you!


Sew, sorry to say, I may be late, but I do hope to have them back tomorrow, so should have my feet out of the mire and well and truly walking/jogging toward the blocks end x

Step 3 Pattilou

I did a whack job this morning.  There was something about my piece that I didn't like and I decided it was the bottom.  This is my piece awaiting the last step:


Okay, here's what I'd done with what I had.  The pieces that I had last
Raggety Sister left a comment that it reminded her of a "hip city neighborhood."  My mind took a new turn from there!

I kept looking at the piece and decided to not use red, but use orange.  I moved things around and came up with this

The little piece with the girls playing dolls was a little scrap from some fabric I'd sent off to Sunshine Quilts and I'd planned just using it in a quilt for some child.  But, I thought, why don't I made a semblance of my childhood neighborhood.  I grew up for the most part in a business district of a small town.  Across the street was the elementary school and down the street was the butcher, the cleaners and and electrician's shop.  My dad had a bakery.  We lived in the apartment above it until I was about eight and then my parent's purchased the house just next to the bakery.  So the little girl is me playing with a friend at my house.  The house on the right is her house.  It was in a neighborhood.  I loved that neighborhood and thus I put the little window on my friend's house that represents the love I felt when at her house.  The black in front was to represent the street.

I decided I needed a sidewalk between the lawn and the street and added this
But, as I said before, it bothered me--too much black at the bottom and the strip for the dividing line was too big.  So, I cut it down and this is now my piece.
I think I like it better.  I have an idea for a border, but I'll wait until the next step for the directions.

Sunday, May 6, 2012

LRR2 step 3


I went round and round my head with this step.  Add color.

  I thought about a brighter blue, but then the whole piece would practically be shades of blue.  I knew I had to be braver than that. I tried black, and white, and a black and white print.  I even tried holding up a purple.

 Finally, I decided that I had already touched on color, just somewhat timidly.  I didn't have any more of that yellow, but I had this gold that has yellow flecks in it and I had more of the hot pink  So, I thought I'd pull those colors to the front, instead of being just hints of color.  I made the pink border wide, so I have room to play with it some more, depending on what the next step brings.

Much Better


Here are pictures of the two pieces I decided to work on through this project. After the second round, I just wasn't happy. However, adding the "color", resolved some of my problems. I know I am liking these much better.

Tuesday, May 1, 2012

Starting Over

I just wasn't  happy with the center of my RR, and my Step 1 didn't improve anything.  If I didn't start over, I knew I'd lose interest in the RR and I didn't want that to happen.

So  I began again, this time with triangles left from a long ago traditionally pieced quilt and added more triangles cut from 3 old (traditional) blocks. That became my liberated center . Next up was making fabric from more of the original triangles. I cut the made fabric into triangles and added them to the top and bottom of the center block. Then I made more fabric from tiny blue scraps and added a 1" wide border to all sides.

Now I'm smiling and I'm ready to add color for Step 3.