Thank goodness for a four-day weekend! Sewed like crazy for two evenings creating green fabric - all to show is 7 x 4.5" squares and smaller pieces of made fabric, interest waning a bit... because I can't think what I will do with them, and surely will need lots more....
Saturday, thought that maybe I should not make fabric from such small pieces, start with longer strips, pull all the lilac strings and ... yay! in 15 minutes flat had stitched and cut these 3.5" pieces. A border later?
Monday morning, so enthused with that turn around, I wanted to do something with red, and found in the red box all the left over string pieces from
Orca Bay (mostly the triangles I cut the wrong way, because not paying attention!), Ok... seeing I'd added the turquoise slash, picked some 4.5" squares with turquoise and made these half-square triangles (hmm... more scraps for later!) Various sizes... but at this point no idea how they'll get used!
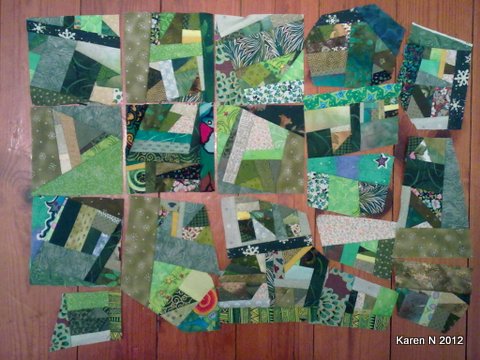
Maybe should try again with the greens, using strings, and ended up making this, thanks to
Anna's blog. Again perhaps should have had wider pieces, as it took all evening. It's about 14" x 16". It looks better in the photo than in real. But I could cut it up later!
So tonight, what to do, what to do?... then saw what
Margaret had said about containing her orange... think I know what, add a border...
... and I think (see, not stitched yet..) this might work...
Or go off on a complete tangent!


.JPG)
.JPG)